Start with Ternair
Audience Manager (data)
Select & Segment
Combine & Exclude
Enrich & Edit
Upload file
Import file
Snapshot
Web service
Coupons
Datamart
Aggregations
Scriban
RabbitMQ
Campaign Manager (channels & content)
Key path
Automation
Execute
Schedule
Webhook
Time zones
Reports
Email dashboard
Campaign calendar
Email conversion dashboard
Manage
RabbitMQ
RabbitMQ
The RabbitMQ block lets you retrieve data from a RabbitMQ queue and process it in your Campaign environment. The block connects to a preconfigured RabbitMQ connection, displays the incoming messages, and lets you decide which fields to map and which field to use as the primary key.
Please note: To use a RabbitMQ block, you must first configure it in the General Settings required.
Add a block and establish a connection
Drag a RabbitMQ block onto the workspace. The block will then open automatically, and you can immediately connect it to the RabbitMQ connection that was configured in the general settings.
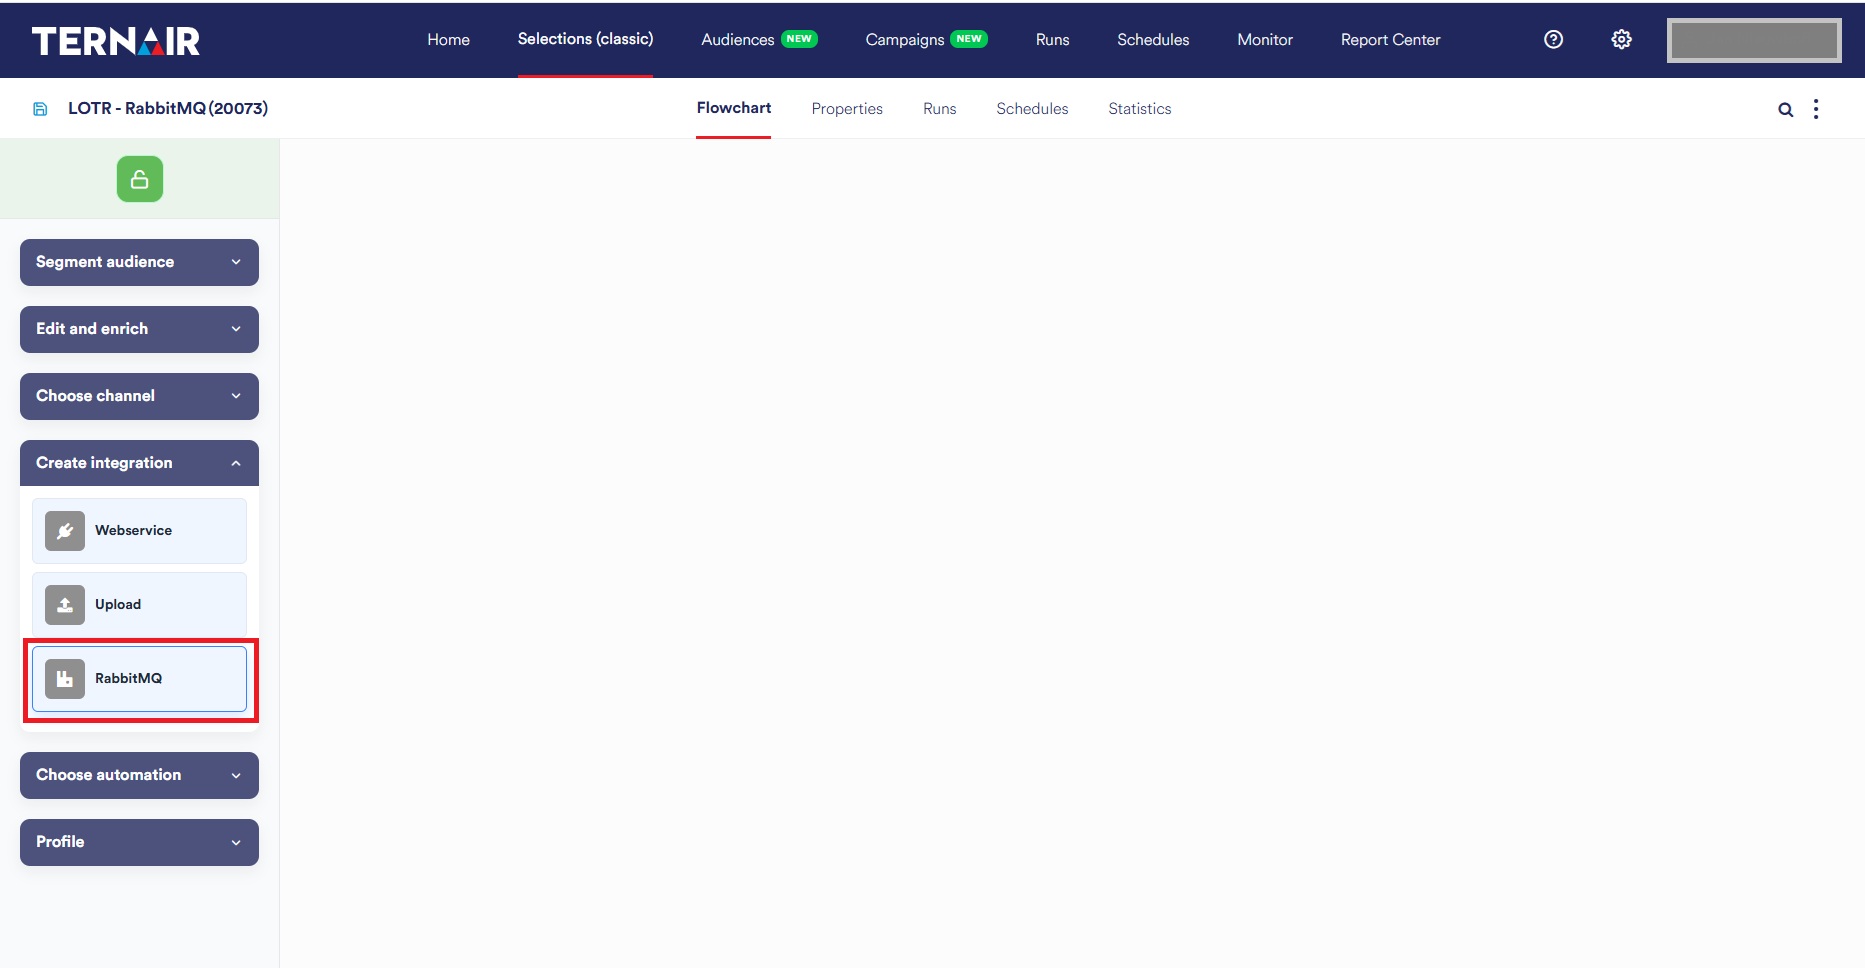
Click the "RabbitMQ Connection" field to open the dropdown menu. Here, you'll see all the RabbitMQ connections that have been created in the general settings.
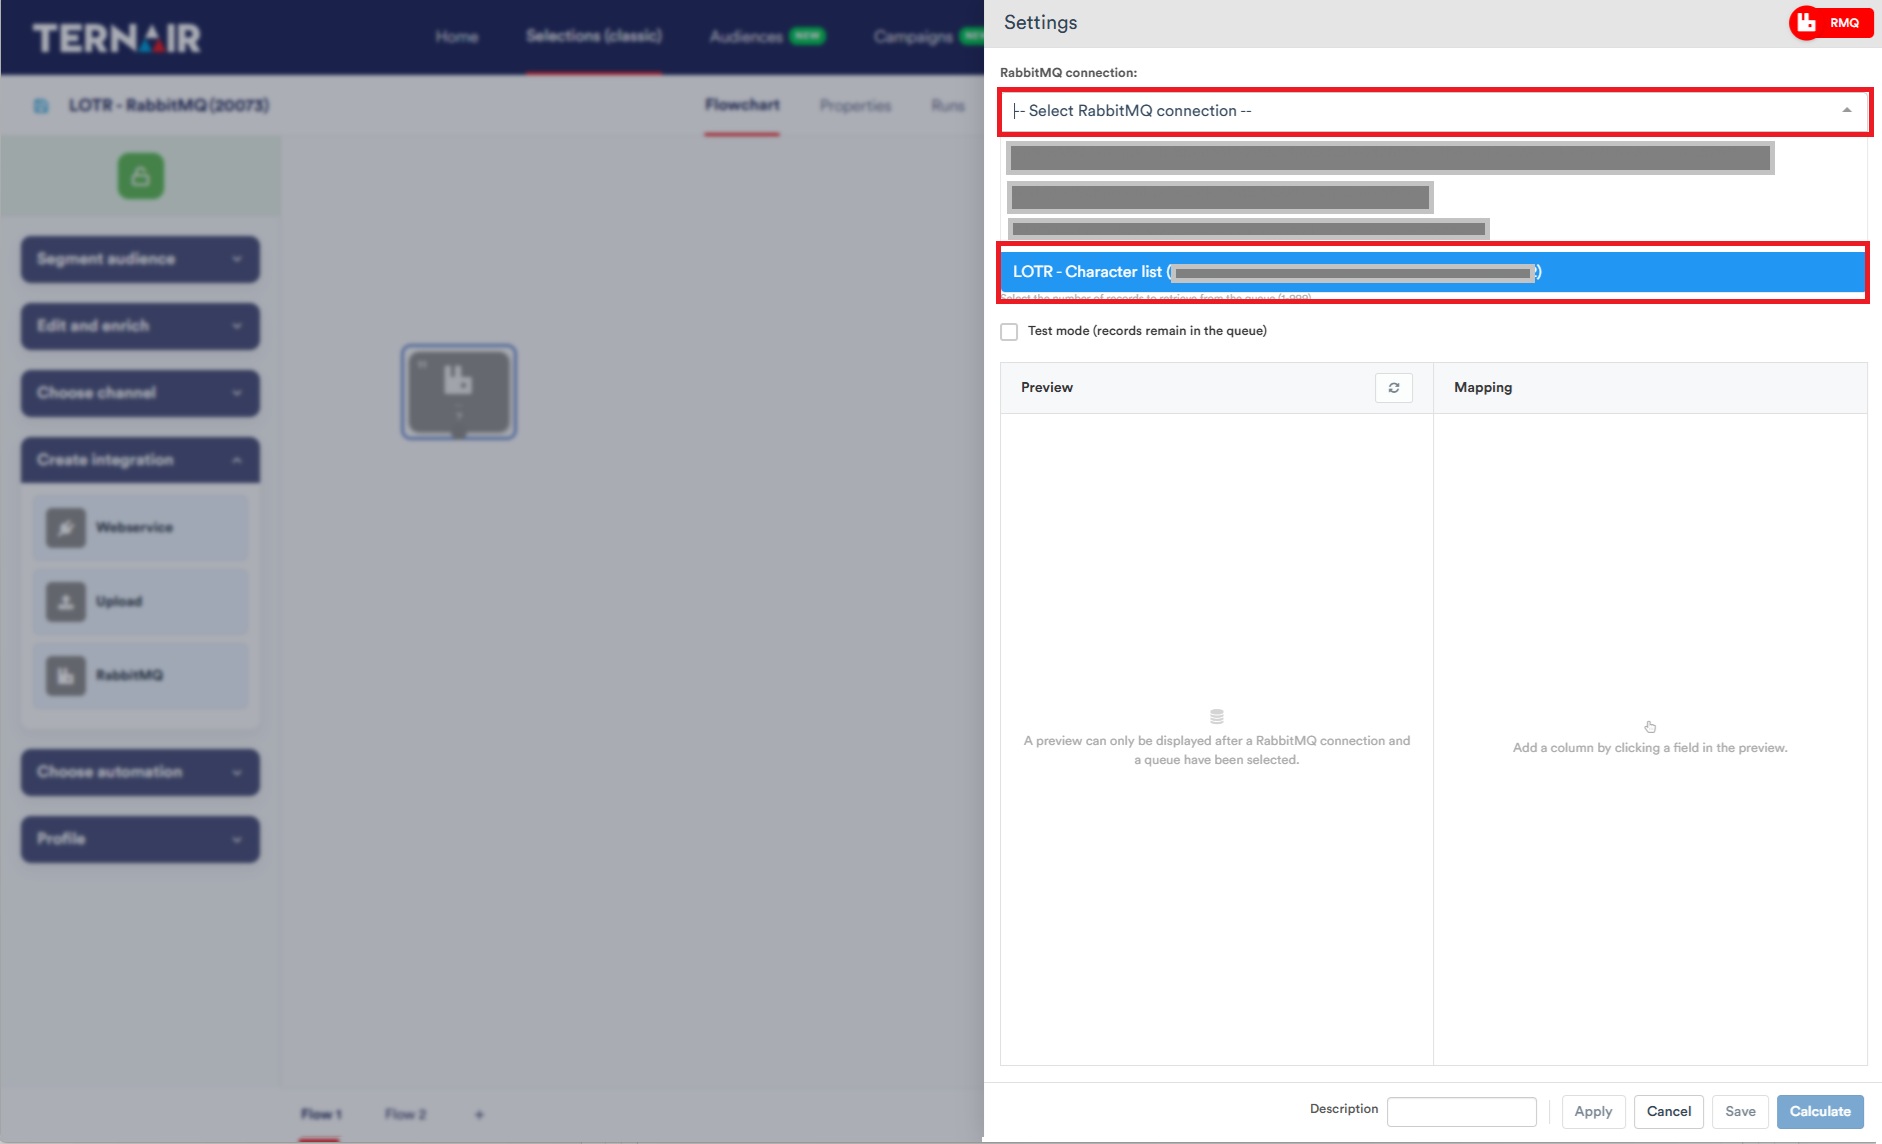
Select and Test Connection
Select the desired connection from the dropdown menu. In the screenshots, we use the "LOTR - Character list" connection as an example. Once you've selected a connection, a "Message preview" will immediately appear, displaying the data from the queue.
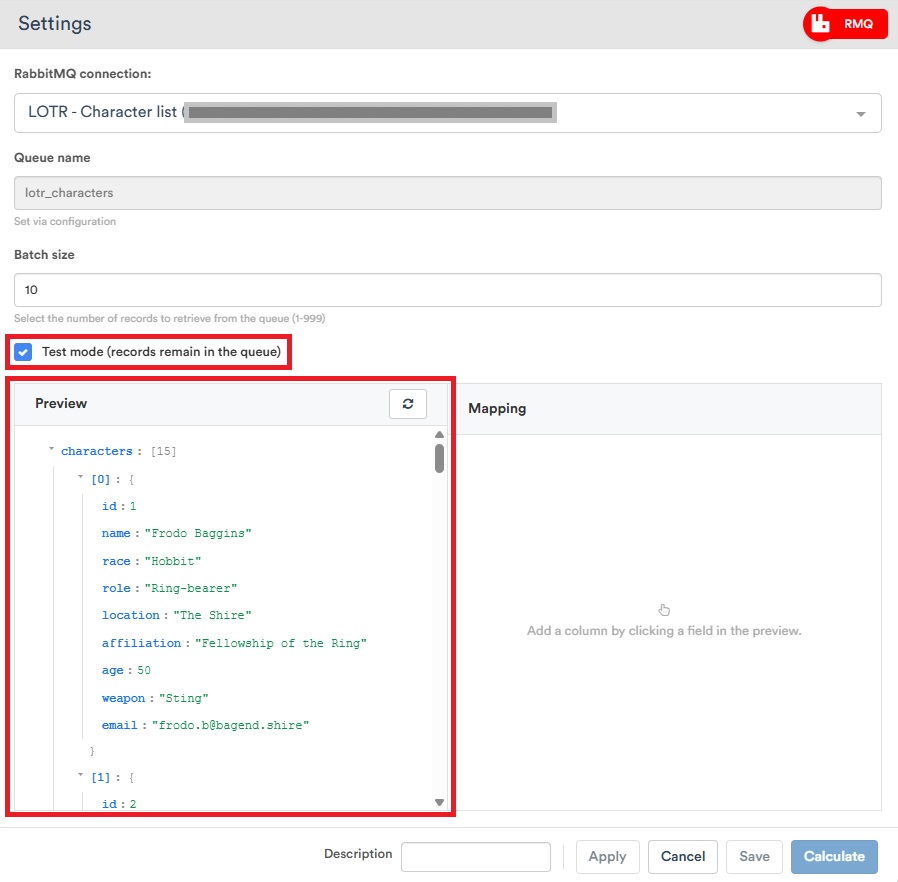
Check the "Test mode" box to keep the records in the queue. This allows you to safely test the queue without all the data being deleted immediately.
Fields and Mapping
Next, map the fields. To do this, click the desired fields in the "Message Example." The selected fields will then automatically appear in the "Mapping" screen.
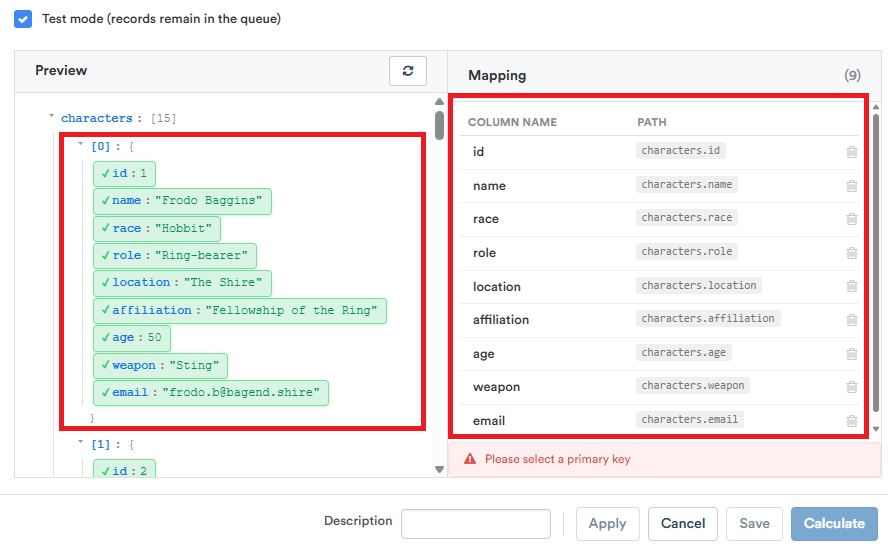
Set the Primary Key
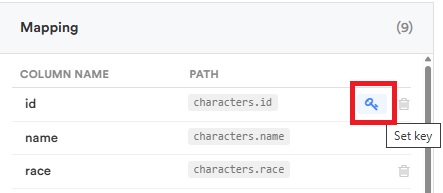
As a final step, specify a primary key. In the "Mapping" list, click the key icon next to the field you want to use as the primary key:
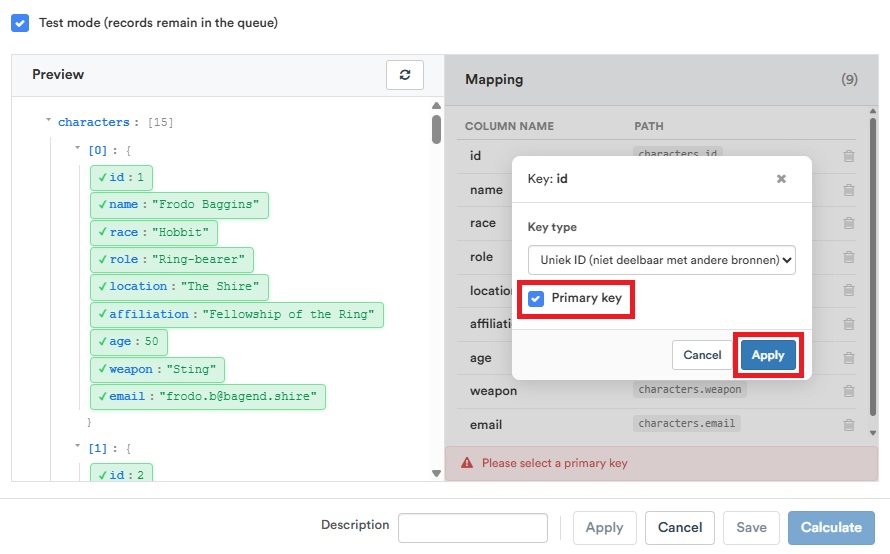
Then select the correct key type from the dropdown menu and check the "Primary key" box.
Save
Click "Apply" and save the block.
Testing
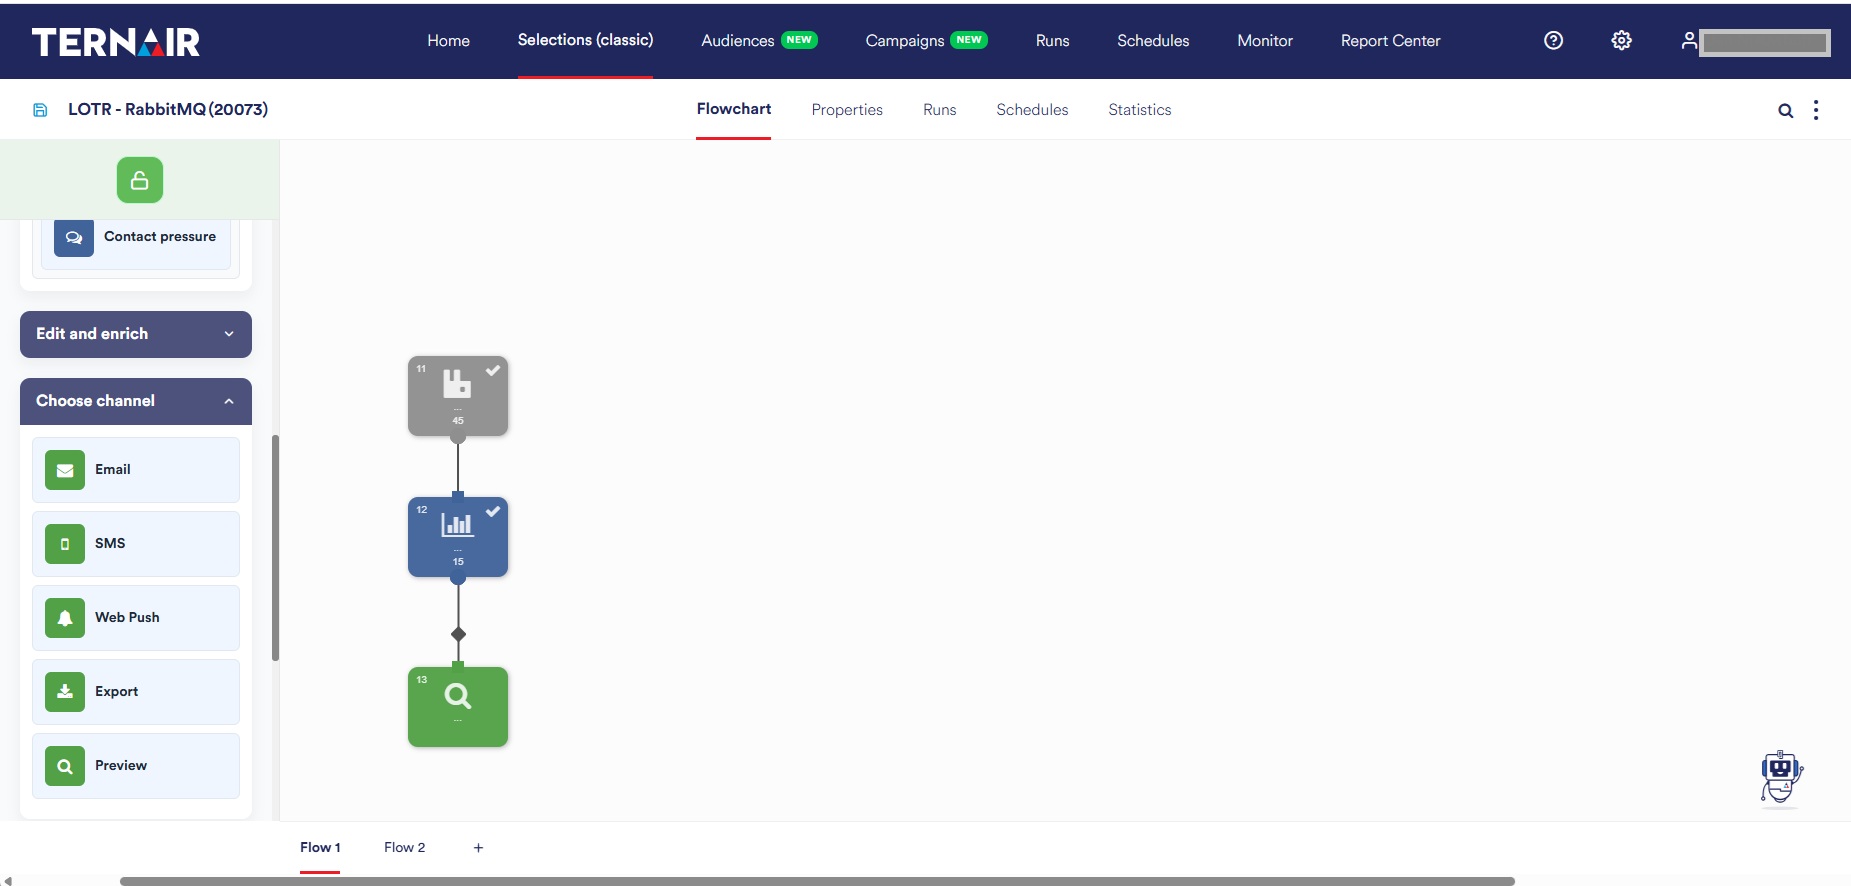
Use a select block and a preview block to verify that all data is being retrieved and processed correctly.
Getting Started
If all the tests pass, you can uncheck the "Test mode" box. Now, every time the block runs, the messages will be retrieved from RabbitMQ and immediately deleted from there.