Export


Icon | Tab | Description |
|---|---|---|
| Mapping | Select what data you want to include in the export and in what order it should be displayed |
| Settings | Determine to which to export the output |
| Distribution | Select the required export method |
| Contacts | Create contacts from the records in the export |
Mapping


Settings

No. | Setting | Description |
|---|---|---|
1 | Type | Specify whether you want to export in an Excel (.xslx) or create CSV file. |
2 | Encrypt file | If you export a file to .xslx (Excel) you have the option to encrypt the file. Check this option and specify a password when activating the option. |
3 | Make header rule | Determine whether or not to create a header rule. |
4 | Separator | The separator is used to separate fields in the export file (comma, semicolon, tab or lock character). Enter your own separator under 'Other'. This must be a character (for example: #) or a string (~#~#~#). |
5 | File extension | The file extension of the export file (.csv or .txt) |
6 | Export filename | Empty text field for specifying a filename. For example, this field is filled with 'Selection code'. It is possible to add a date/time to the name by checking the 'Add Time Stamp' option. |
7 | End of record (Header) (Value) | Indicator that indicates whether it is an end of record. This is an optional field. When in use, an end-of-record string is placed at the end of each record. The value of this string can be entered in the Value field. The name of the field can be entered in the "Header" field. Both fields are required, otherwise the column will not be added to the export. |
8 | Apply Quotes | |
9 | Text indicator (Escape character apply) | Includes the beginning and end of a field value. This setting is not mandatory. If you apply this setting, all field values and field names will be surrounded by double quotes (""). In some situations it may be necessary to use an escape character. For example, if the field value itself contains quotation marks, surrounding them might corrupt the field value. This can be solved by using an escape character. By default, this is a backslash ( Example without an excape character: "this is an example" of using a text indicator. Example with an excape character: "this is an example" of using a text indicator. |
Distribution

Nr. | Option | Description |
|---|---|---|
1 | Download via portal | If an export has been created, it can be downloaded via the Runs screen in the Portal. |
2 | E-mail addresses | When a file is exported to e-mail, an e-mail notification is sent to the e-mail address provided. The link and pin code sent by e-mail can be used to download the export file. If notifications are to be sent to multiple e-mail addresses, they must be separated by a semicolon. |
3 | FTP-location | When an export is created, it is sent to the specified (remote) FTP location. |
4 | - Type | Select the FTP type you are using; FTPS (secure), FTPS (secure, legacy) or SFTP* (secure). The default value is FTPS (secure). |
5 | - Host | The host name of the FTP. |
6 | - Port | Port number connected to the FTP site;
|
7 | - Username and password | Your username and password for the FTP location. |
8 | - Folder | The folder where the file should be saved. If the specified folder does not already exist, it will be created automatically. When setting up the use of an FTP location, you can specify a directory as the directory name. The FTP directory name can be a path, i.e., multiple directories. |
9 | - Passive | In active mode, the client sets up the command channel, but the server is responsible for setting up the data channel. In passive mode, the client establishes both channels. |

Contacts

Run date = run date
Run date + X days = run date + number of days; for example, run date + 2 days
Fixed date = select a fixed date from the calendar.

General settings
Option | Description |
|---|---|
Block template | Every app block can be saved as a template. After an app block is saved as a template, it can be used as a template for other app blocks. A block template can be reused by clicking on 'Open block template' in the lower left corner of the app block and selecting the template from the list. |
Description | You can specify a description for a snapshot block. The description field is for specifying a logical description for the block. This makes the contents of the app block easily recognizable in the selection flowchart. |
Applicate | Clicking the apply button saves the preliminary settings for the selection block. |
Cancel | Use the 'Cancel' button to undo your changes. |
Save | Use the 'Save' button to save your changes without (re)calculating the block. |

Execute


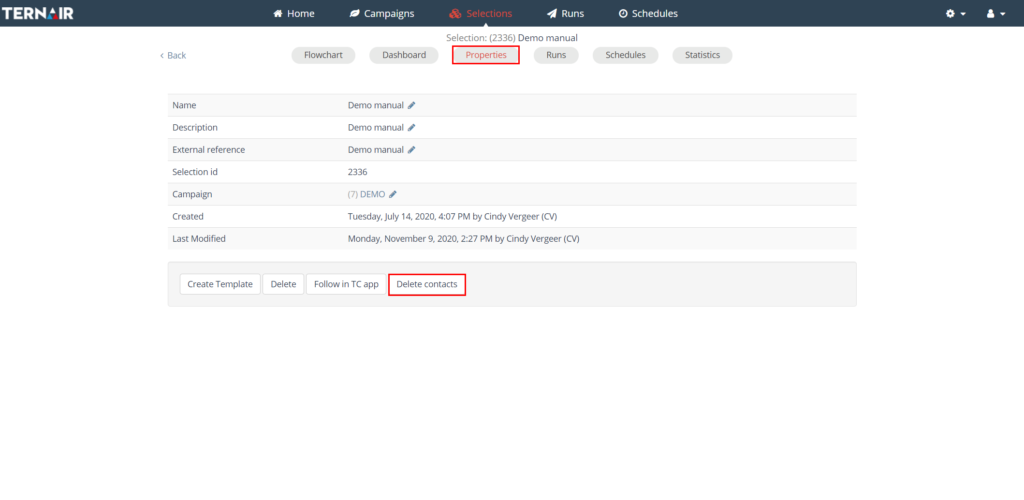
Deleting contacts


