SMS

The output function 'SMS' can be used to set up an SMS mailing in Ternair Campaign.

Drag an SMS block to the worksheet. Connect the SMS block to one or more selection blocks.


You can only create an SMS if the selection has been saved.

Double-click on the SMS block to open the settings.
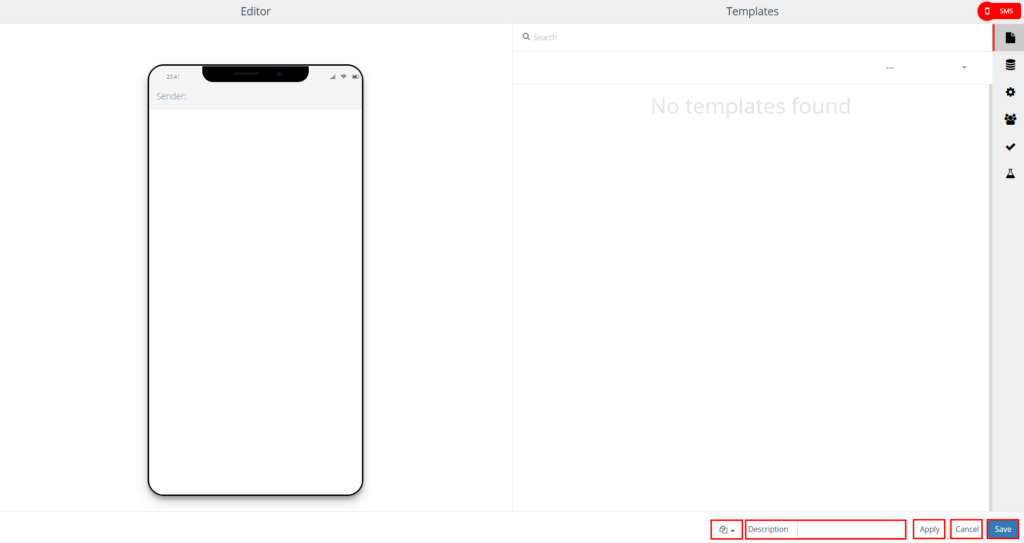
On the left side, the SMS editor is displayed. On the right side you will find the settings.


This section focuses on the following options; each option consists of a tab in the settings of an SMS block.

Filling in the mapping tab is mandatory, settings and contacts are optional.

The SMS editor (on the left side of the screen) is always visible.

Icon

Option

Description

Templates

Select template

Mapping

Map personalized fields for text messages

Settings

Send confirmation message after sending text message(s)

Contacts

Create contacts for the records receiving the text message

Validate

Validate text message content

Test

Test text message


Editor

There are two ways to create the content of a text message: by using the editor (1) or by using an existing template (2).

In the editor, you can format the content for the text message.
  • Choose the name of the sender

  • Type the content for the message


Please note:
  • The content of the message can consist of up to 160 characters.

  • The sender may contain up to eleven numbers or characters

  • A message is sent as plain-text.


Templates
Option two is to select an existing SMS template.

After selecting an existing template, it can be customized (on the left side). Click on the content you would like to modify and customize it.


Mapping

All the fields you would like to use should be selected ('mapped') on this tab.

These fields consist of:
  • Mobile phone number (=mandatory)

  • Fields by personalization/dynamic content (=optional)


Use the '+' icon at the top right to add one or more fields to the Mapping.

After the fields are added to the Mapping (right column), they must be 'mapped' to the fields in the left column Fields.

Use the 'Mapping Fields Automatically' button or drag and drop the field from the right column to the corresponding field in the left column.

In addition to the fields available in the database, it is also possible to add fields with a fixed text value. Click on the 'Fixed Values +' field to add a text field with a fixed value. Both the header and value of the field must be specified.


More details: Mapping.

Personalization/dynamic content

The content of text messages can be determined dynamically. Personalization fields can be called by placing brackets [ ] before and after the name of the personalization field. For example: [FORENAME].

Please note that when personalizing a text message, it is important to place the most important information at the beginning of the message. For example, if a long name is pre-populated in a text message, the message content may exceed 160 characters. Characters over 160 will not be sent.


Settings

On the 'Settings' tab, you have the option to automatically send a confirmation message by text message or email when all text messages have been sent. This text message or email is a message with process information that will be sent to the specified phone number/email address when all text messages have been sent.


Contacts

On the 'Contacts' tab you can specify the channel and contact date you want to register for the contacts (=optional).


More details: Contacts

Validation

On this tab, the are the following validations performed:
  • Are all fields used mapped?

  • Are all the personalization fields used correct?

Use the top right button to run the validation again.


More details: Validation

Test

The 'Test' tab provides the following options:
  • Viewing (personalized) text messages

  • Send individual test messages

  • Send multiple test messages (up to 10)
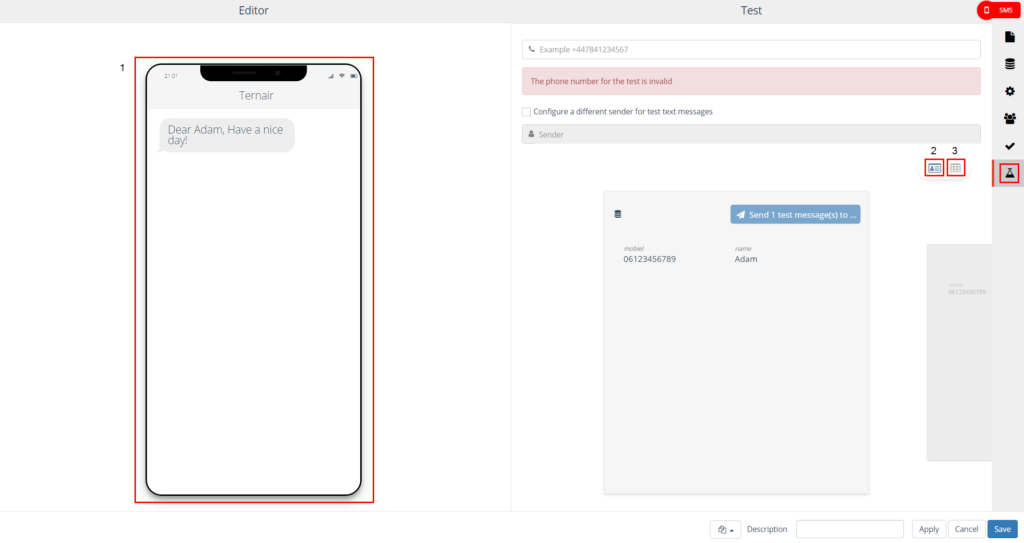


View personalized text messages for all relations in a selection
On the left side, a preview of the (personalized) text message is shown.

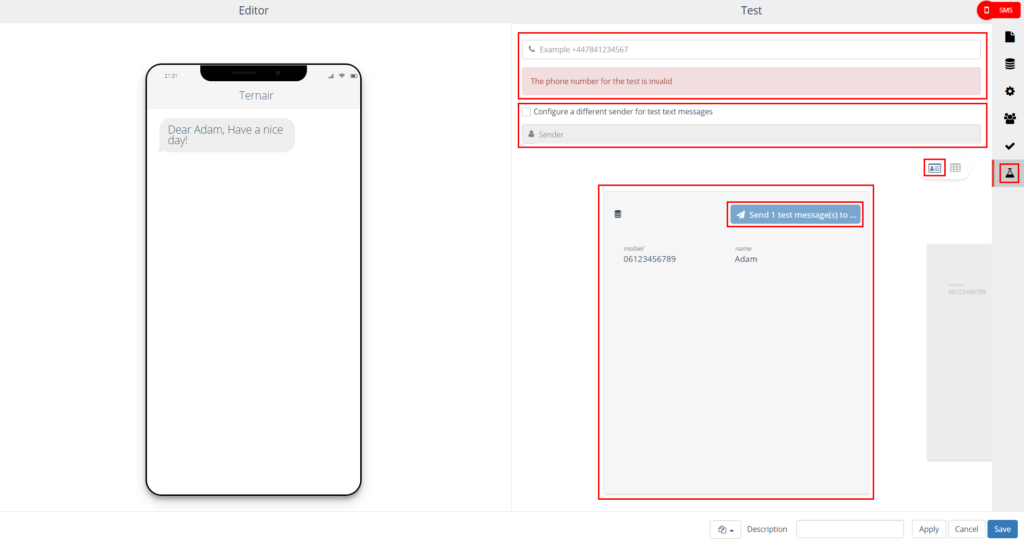
Send individual test messages
Click the 'card' icon to send an individual test message.
  • Fill in the phone number for the recipient of a test message. Separate multiple numbers with a semicolon (;) For example: +31612345678; +31687654321

  • The subject of the message can optionally be changed to make it clear that it is a test message.

  • Click the 'Send 1 text message(s) to...;' button to send a test message to the specified phone numbers.


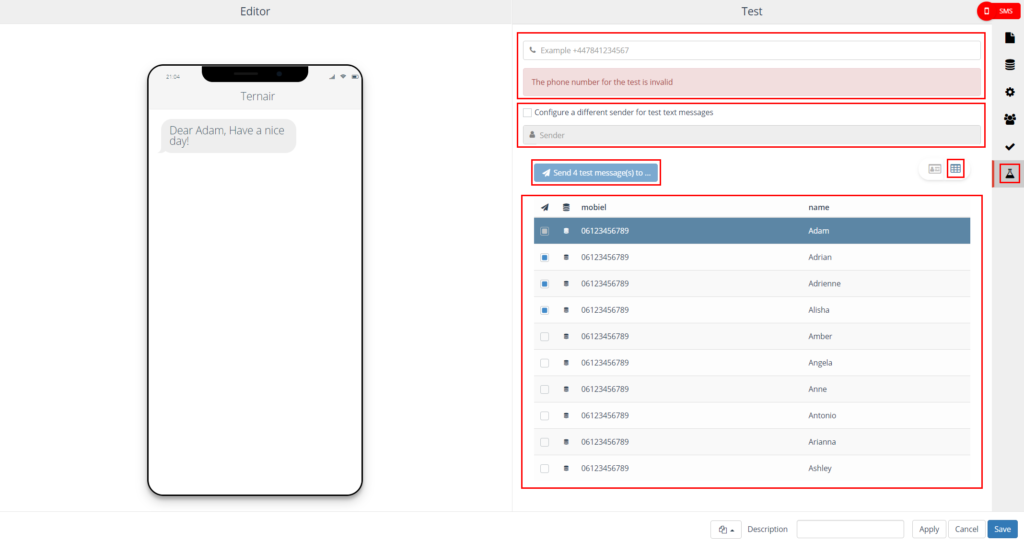
Send multiple test messages (up to 10)
Click the 'table' icon to send up to ten test messages.
  • Fill in the phone number for the recipient of a test message. Separate multiple numbers with a semicolon (;) Eg: +31612345678; +31687654321

  • The subject of the message can optionally be changed to make it clear that the message is a test message.

  • Select the number of test messages (up to 10)

  • Click the 'Send X text message(s) to...;' button to send a maximum of 10 test messages to the specified phone numbers.


General Settings

Option

Description

Block template

Every SMS block can be saved as a template. After an SMS block is saved as a template, it can be used as a template for other SMS blocks. A block template can be reused by clicking on 'Open block template' in the lower left corner of the SMS block and selecting the template from the list.

Description

You can specify a description for an SMS block. The description field is intended to specify a logical description for the block. This makes the content of the output block easily recognizable in the selection flowchart.

Applicate

Clicking the apply button saves the preliminary settings for the selection block.

Cancel

Use the 'Cancel' button to undo your changes.

Save

Use the 'Save' button to save your changes without (re)calculating the block.


Video


Copyright © 2025 Ternair.